Welcome to your go-to guide on using concrete for pavers in NZ. Whether you’re planning a new patio, driveway, or garden path, choosing the right material is key to getting results that last. Concrete stands out for its strength, low upkeep, and ability to handle New Zealand’s varied weather. In this post, you’ll learn why concrete is a top choice for pavers, the best mix to use, how to prep your base, common mistakes to avoid, and what it might cost. Whether you’re doing it yourself or hiring a pro, this guide will help you make smarter decisions from start to finish.
The best concrete for pavers in NZ is a mix with a strength of 25–30 MPa, designed to handle outdoor conditions like rain, frost, and heavy foot traffic. Use a well-compacted base and consider options like plain, exposed aggregate, or coloured concrete for added durability and style.
- Why Choose Concrete For Paving In NZ
- Types Of Concrete Used For Pavers
- Concrete Mix Requirements For Pavers
- How To Prepare The Base For Concrete Pavers
- Installation Methods (DIY vs Professional)
- Cost Of Concrete Pavers In NZ
- Maintenance Tips For Long-Lasting Concrete Pavers
- Common Mistakes To Avoid When Using Concrete For Pavers In NZ
- Regional Considerations In NZ
- FAQs: About Concrete For Pavers In NZ
- Conclusion
Why Choose Concrete For Paving In NZ
Concrete is one of the most reliable and popular paving materials used across New Zealand, and for good reason. Whether you’re laying a new patio in Wellington, upgrading a driveway in Auckland, or building a walkway in Christchurch, concrete delivers performance, durability, and value that lasts for years.
Strength And Long Lifespan
Concrete paving offers unmatched strength, making it ideal for high-traffic areas like driveways and footpaths. Unlike other materials, concrete doesn’t shift or break under pressure when properly installed. For example, concrete driveways in suburban Auckland commonly last 20 to 30 years with minimal signs of wear. Patios and backyard paths in places like Hamilton and Tauranga also benefit from the material’s stability. When compacted over a solid base, concrete can handle both foot traffic and vehicle weight without buckling or loosening.
Withstands NZ’s Climate
New Zealand’s weather can vary widely, cold frosts in the South Island, high rainfall on the West Coast, and strong UV rays in the North. Concrete is designed to hold up under all these conditions. It doesn’t warp under sun exposure, it won’t become slippery during rain if textured correctly, and it holds its shape even after a heavy frost. With proper curing and sealing, concrete resists cracking caused by freeze-thaw cycles, making it ideal for outdoor spaces throughout the country.
Low Maintenance Compared To Bricks Or Gravel
Concrete pavers require far less upkeep than other popular materials. Bricks can shift and grow weeds between joints. Gravel needs regular raking and replacement. But once concrete is installed and sealed, it needs little more than a sweep and occasional rinse to stay clean. Sealing the surface every few years adds extra protection from stains, algae, and weather damage. For busy homeowners or commercial properties, this makes concrete a practical and cost-saving option over time.
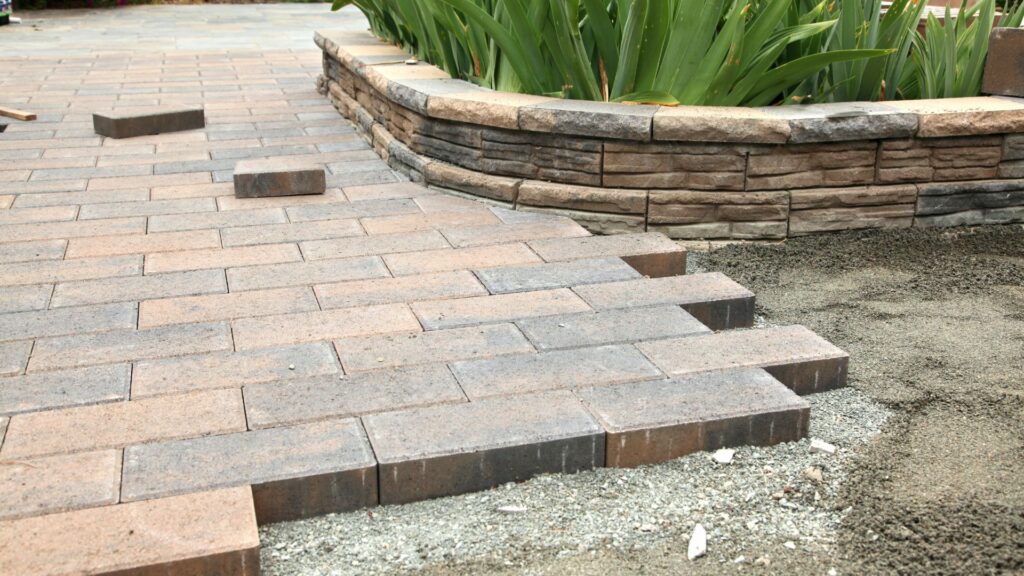
Versatility In Design And Finish
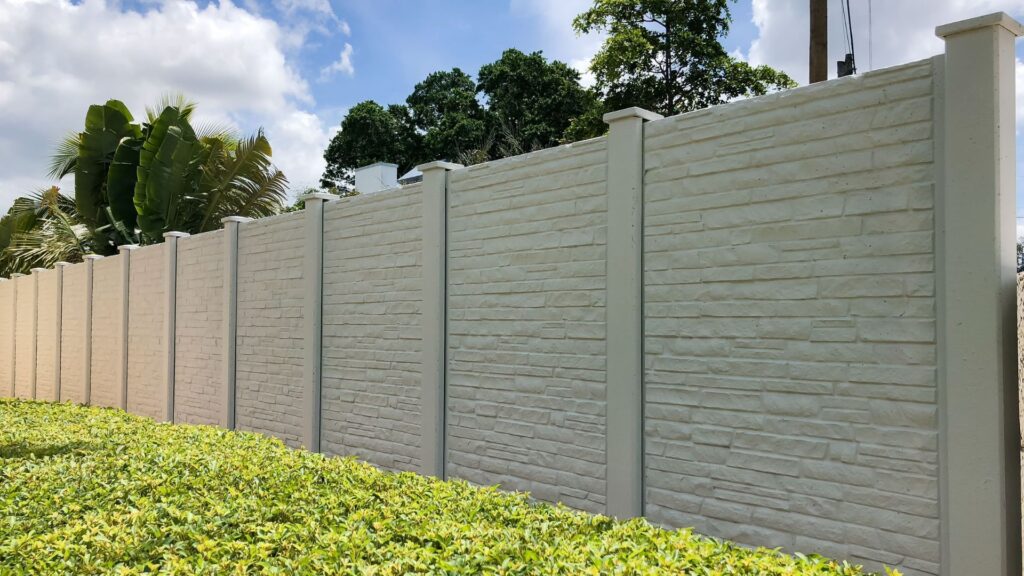
Concrete isn’t just about utility, it also offers aesthetic flexibility. You can choose from smooth finishes, textured surfaces, exposed aggregate, or coloured concrete to match the look of your home or landscape. Many modern Kiwi homes use coloured or stamped concrete to elevate curb appeal, while exposed aggregate has become popular for its visual texture and slip resistance. Whether you want a sleek driveway or a rustic patio, concrete can be shaped, coloured, and finished to fit your style.
Concrete paving in NZ continues to be a trusted option for homeowners and builders who need a tough, low-maintenance surface that still looks good. With a range of finish options and proven durability in all types of New Zealand weather, concrete remains one of the most dependable paving materials available.
Types Of Concrete Used For Pavers
Choosing the right type of concrete is essential if you want your pavers to last and look good in New Zealand’s conditions. Whether you’re laying a new driveway, patio, or garden path, different types of concrete offer different benefits. Below, you’ll find a clear breakdown of the four most common types of concrete used for pavers in NZ. Each type has its strengths, limitations, and ideal use cases.
Plain Concrete
Plain concrete is the most basic and widely used option for pavers. It’s a simple mix of cement, sand, and gravel without any special finishes or reinforcements. Homeowners choose plain concrete for its affordability and functionality.
Pros:
- Cost-effective for large areas
- Easy to install and finish
- Low maintenance
Cons:
- Lacks visual appeal
- More prone to surface cracking if not sealed
- Can get slippery when wet
Plain concrete works well for low-traffic areas like utility paths, garden sheds, or budget-conscious patios. It’s also a solid choice if you plan to cover the surface with tiles or outdoor mats.
Reinforced Concrete
Reinforced concrete includes steel bars (rebar) or wire mesh within the mix. This added support increases the strength of the concrete and helps prevent cracking over time. It’s especially useful in areas that need to support heavy loads.
Pros:
- High structural strength
- Less cracking and shifting over time
- Better for long-term durability
Cons:
- More expensive than plain concrete
- Requires skilled installation
- Takes longer to set and cure
This type is ideal for driveways, parking areas, and any surface expected to hold vehicles or heavy outdoor equipment. It’s also commonly used in commercial spaces across NZ.
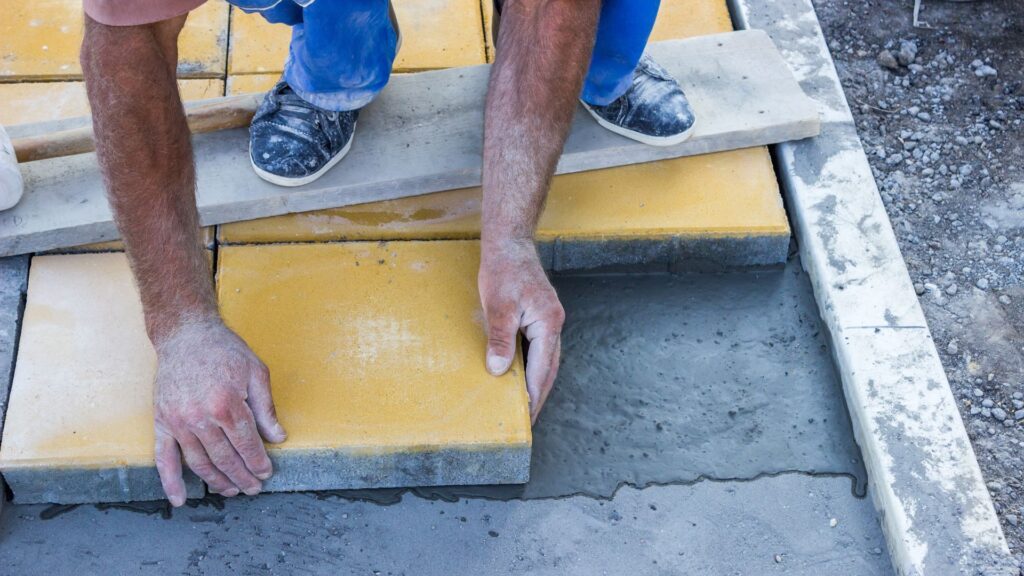
Exposed Aggregate
Exposed aggregate concrete is a decorative option where the top layer is washed away to reveal the natural stones or gravel within the mix. It’s one of the most popular choices in New Zealand for its textured, non-slip surface and attractive look.
Pros:
- Slip-resistant, ideal for wet areas
Visually appealing with various finishes - Durable and weather-resistant
Cons:
- Higher cost compared to plain concrete
- Harder to clean if not sealed
- Needs professional finishing to look even
Exposed aggregate is commonly used around pools, on patios, and in high-traffic walkways. Many homeowners in NZ choose it for outdoor areas that need both function and style. It’s especially popular in Auckland and Christchurch where decorative finishes are in high demand. If you’re searching for “exposed aggregate NZ,” this is the look most people are referring to.
Coloured Concrete
Coloured concrete involves adding pigments to the mix or staining the surface to give it a consistent, vibrant tone. It’s perfect for homeowners looking to match their pavers with the style of their house or garden.
Pros:
- Wide range of colour options
- Enhances visual appeal
- UV-resistant if sealed properly
Cons:
- Colour can fade over time without sealing
- Costlier than standard options
- Repairs can be tricky if colour matching is needed
Coloured concrete pavers are great for patios, courtyards, and entryways where appearance matters. Many NZ homeowners use coloured concrete to create standout spaces in the front yard or garden. It’s also a top choice for modern builds aiming for a clean, coordinated look. If you’re searching online for “coloured concrete pavers,” you’ll find inspiration from both residential and commercial projects.
By understanding the pros, cons, and best uses for each type of concrete, you can choose the right one based on your needs, budget, and location in New Zealand. Whether you want something basic, decorative, or heavy-duty, there’s a concrete option that fits the job.
Concrete Mix Requirements For Pavers
Choosing the right concrete mix is one of the most important parts of building long-lasting pavers. Whether you’re planning a DIY project at home or managing a larger commercial job, getting the mix right helps prevent cracking, improves strength, and ensures your pavers look good for years. Here’s what you need to know about concrete mix requirements for pavers in New Zealand.
Ideal Concrete Strength (MPa Rating) For Pavers
Concrete strength is measured in megapascals (MPa), and it tells you how much pressure the concrete can handle before failing. For most residential paving projects in New Zealand, like driveways, patios, and paths, a mix with a strength rating of 25 to 30 MPa is ideal. This range gives enough durability for everyday foot and light vehicle traffic while still being manageable to work with.
For commercial or heavy-load areas, such as carparks or industrial yards, you might need a stronger mix, usually around 32 MPa or higher. If you’re not sure what’s best for your job, talk to a local supplier or builder who understands NZ’s construction standards and climate conditions.
Recommended Mix Ratio For DIYers vs Commercial Projects
The mix ratio refers to how much cement, sand, aggregate, and water you combine to make concrete. Here’s a basic guideline:
- For DIY residential projects (like patios or garden paths):
A common mix ratio is 1 part cement : 2 parts sand : 4 parts gravel, with just enough water to bind the mix without making it too runny. This creates a workable mix that’s strong enough for most home paving uses. - For commercial jobs:
Contractors often use precise batch mixing with ready-mix concrete from trusted suppliers. These mixes follow strict NZ standards and include performance additives for better curing, waterproofing, or strength.
Always use clean, quality materials. Don’t eyeball your measurements, use buckets or a mixer with built-in volume controls. Accurate mixing helps avoid weak spots and early wear.
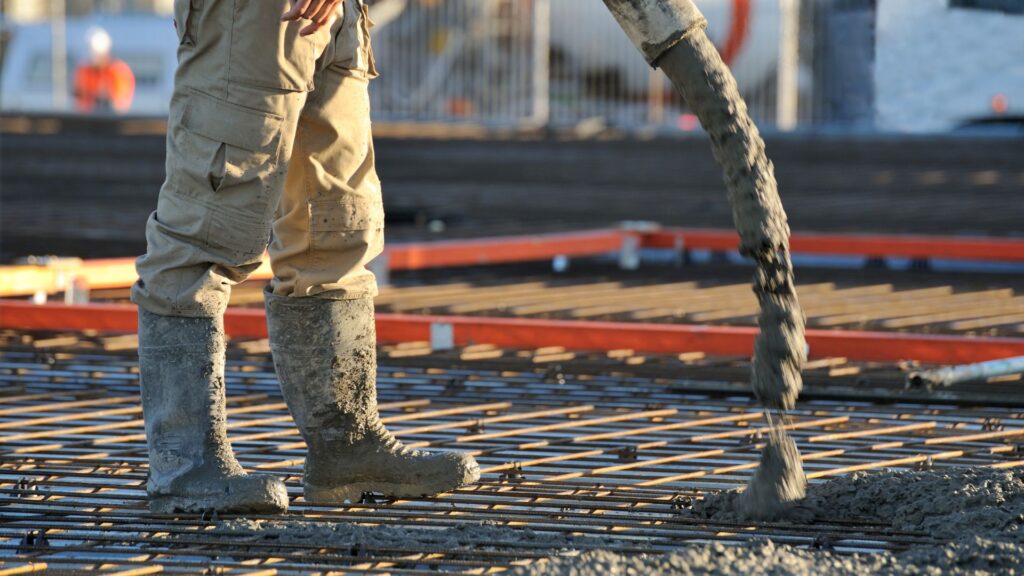
Drying And Curing Time
Drying and curing aren’t the same. Drying happens quickly, but curing takes time, and that’s when concrete reaches its full strength.
After pouring the mix:
- Initial set time: Around 24–48 hours. Avoid walking on it during this period.
- Light use: Wait at least 7 days.
- Full curing: Takes up to 28 days, especially in colder or wetter NZ regions like Wellington or Dunedin.
Keep the surface moist for at least the first few days, especially in hot or windy weather. Covering it with plastic or using a curing compound can also help prevent cracking and improve durability.
Additives Or Sealants Used In NZ For Added Durability
New Zealand’s weather can be tough on outdoor surfaces, especially in coastal or frost-prone areas. To boost your pavers’ performance, you can add the following:
- Plasticisers or water reducers: These improve workability without adding excess water.
- Fibres: Reduce the risk of shrinkage cracks and add internal strength.
- Sealing compounds: Apply a sealant after curing to protect against water, stains, moss, and UV damage. This is highly recommended in damp or shaded areas where mould can grow.
Many NZ suppliers sell premixed concrete with additives tailored to local conditions. Ask for products designed specifically for exterior paving.
Getting the mix right from the start can save you time and money later. Whether you’re laying a few garden steps or pouring a full driveway, follow best practices and use materials that suit New Zealand’s unique environment. If in doubt, talk to a local expert or order ready-mix concrete that matches NZ standards for paving.
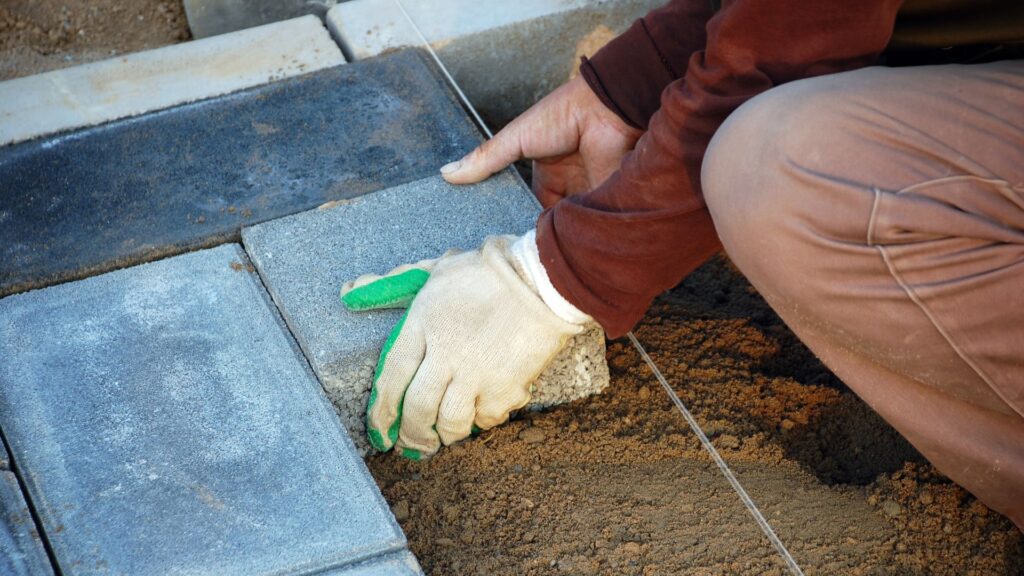
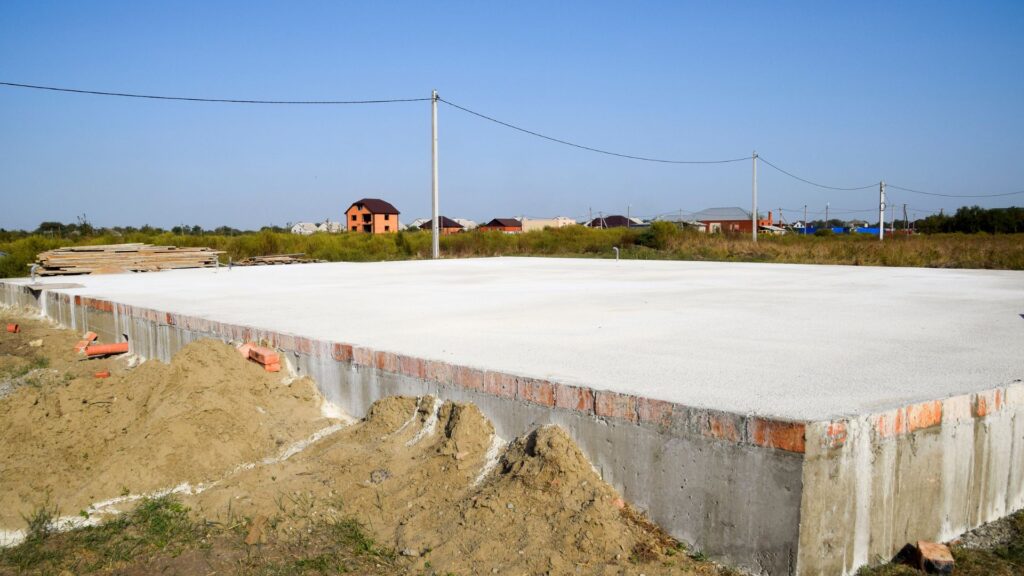
How To Prepare The Base For Concrete Pavers
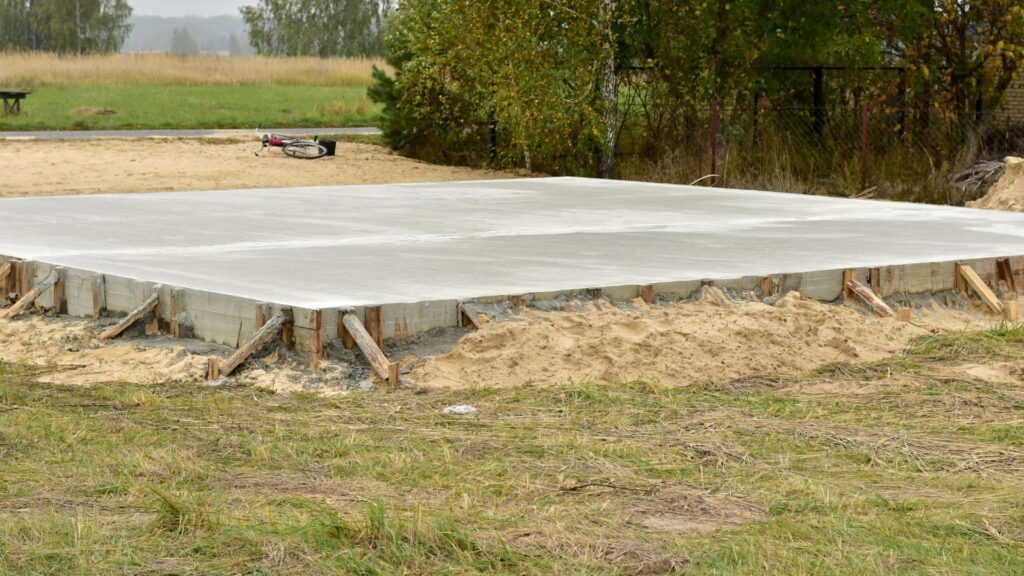
Preparing the base correctly is one of the most important steps when installing concrete pavers. A strong, well-compacted base ensures your pavers stay level, resist shifting, and last for years. Cutting corners at this stage often leads to cracks, uneven surfaces, or drainage problems, issues that are far more expensive to fix later. Whether you’re doing a DIY job or working with a contractor, getting the foundation right is non-negotiable.
Importance Of Base Compaction
Base compaction is critical to prevent the pavers from sinking or shifting over time. When the ground beneath pavers is loose or soft, it compresses under weight, causing dips and uneven surfaces. Compacted soil and aggregate form a stable, solid foundation that can handle foot traffic, vehicles, and New Zealand’s seasonal weather changes.
You should always use a plate compactor to firmly press each layer into place. Compact the subgrade soil first, then compact each layer of gravel or base course added on top. Don’t just rely on weight or moisture to settle the base, mechanical compaction is what gives lasting strength.
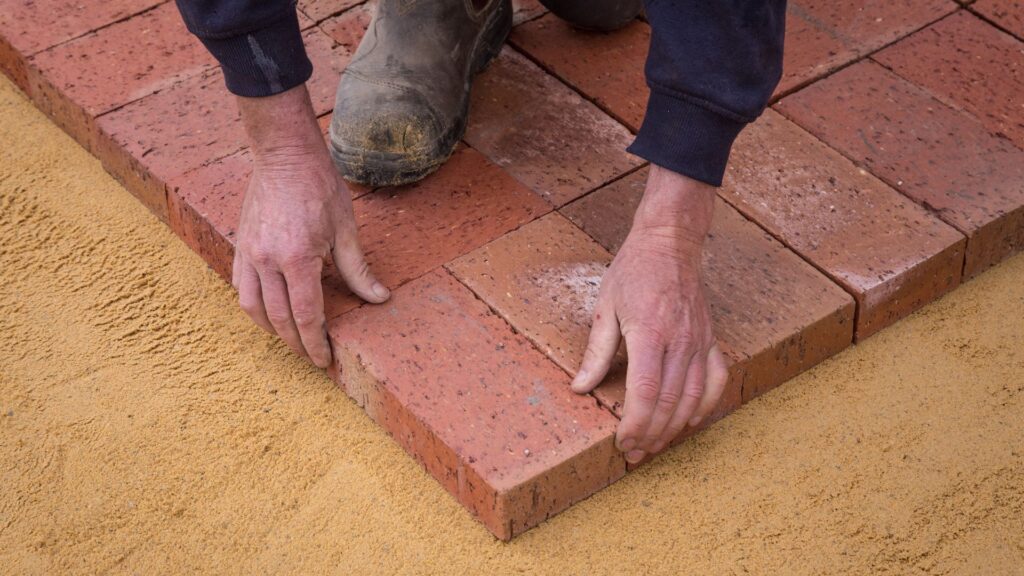
Materials Used For A Strong Paving Base
There are three key materials used when building a concrete base for pavers in NZ: sand, gravel, and geotextile.
- Sand is often used as the top bedding layer where pavers are laid. It helps with leveling and makes it easier to position each paver.
- Gravel, specifically crushed aggregate (not round river stones), makes up the main support layer. This layer should be at least 100mm thick for patios and up to 150mm or more for driveways.
- Geotextile fabric is placed between the soil and gravel layers to stop soil movement and prevent the gravel from sinking into the subgrade. It also helps with drainage and reduces weed growth.
Using the right combination of these materials forms a base that is both stable and long-lasting.
Drainage Considerations In NZ Properties
Drainage is a big deal in New Zealand, especially in areas like Auckland and Wellington where heavy rain is common. If water doesn’t drain properly from under your pavers, it can weaken the base and cause the pavers to shift or sink. That’s why slope and runoff need to be part of your base design.
Your base should have a slight slope, about 1.5%, to help water drain away from buildings and toward a suitable runoff point like a garden bed or stormwater system. If you’re in a low-lying area or your soil has poor drainage, you may need to add a drainage layer or install perforated pipes under the base.
Practical Tips For Base Preparation
- Always level before pouring: A level base doesn’t just look better; it also ensures that pavers settle evenly and maintain structural integrity over time. Use a long straightedge or screed board to check your surface as you go.
- Allow for water runoff: Your pavers should sit slightly above ground level with the base sloped to direct water away. This is especially important in flood-prone or sloped areas in cities like Auckland and Wellington.
- Don’t pour directly on soil: Always use gravel or base course between soil and concrete to avoid shifting or cracking.
- Compact in layers: If your base is thicker than 100mm, compact it in two or more passes rather than trying to compress it all at once.
When it comes to concrete pavers, the strength is in the base. Preparing it properly saves you from costly repairs and ensures a clean, professional finish that stands the test of time. Whether you’re paving a patio in Christchurch or a driveway in Tauranga, following these base prep principles will give you a more reliable and attractive result. If you’re searching for the right approach to a paving base NZ or looking to improve your concrete base for pavers, start with solid prep and smart drainage.
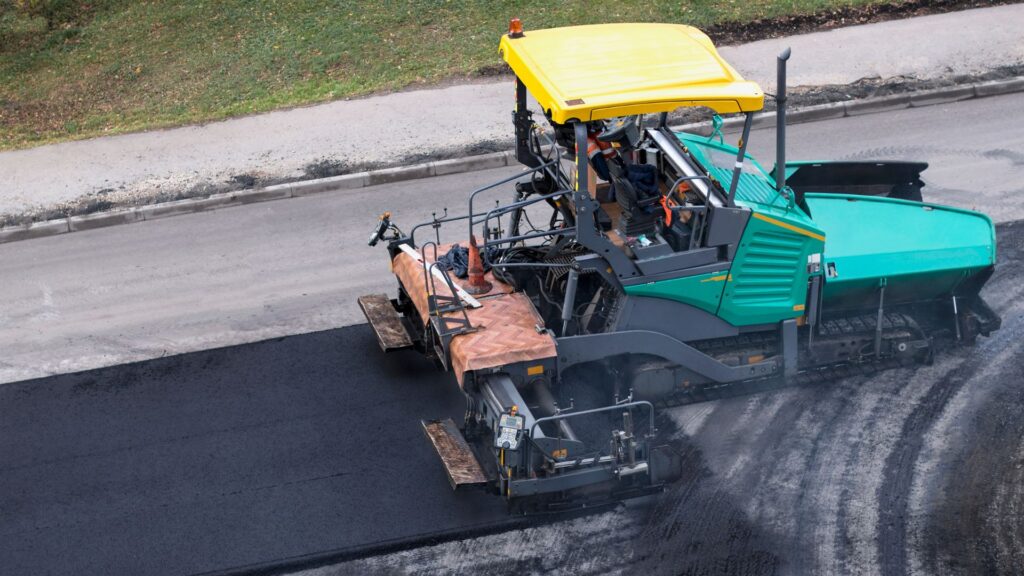
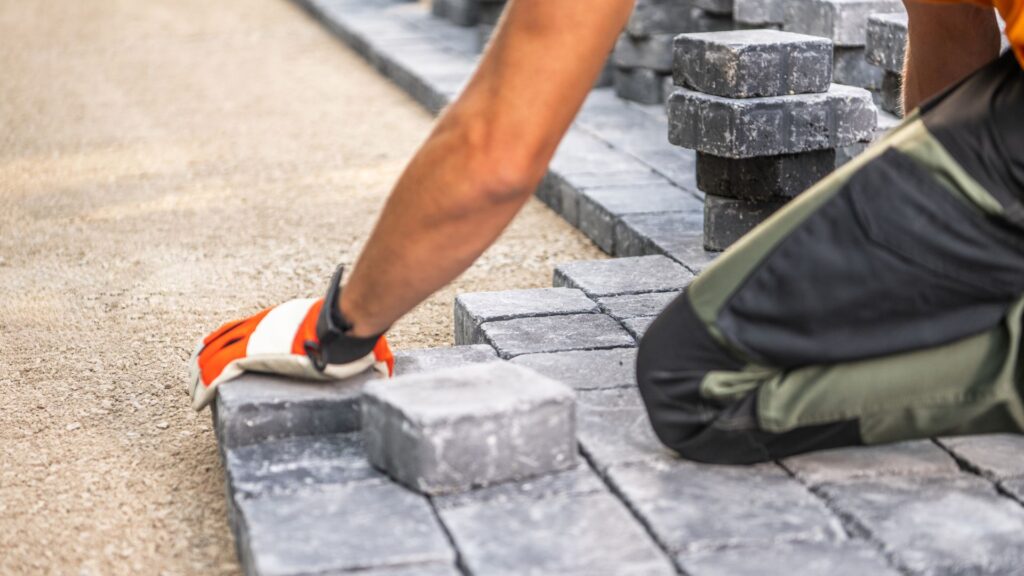
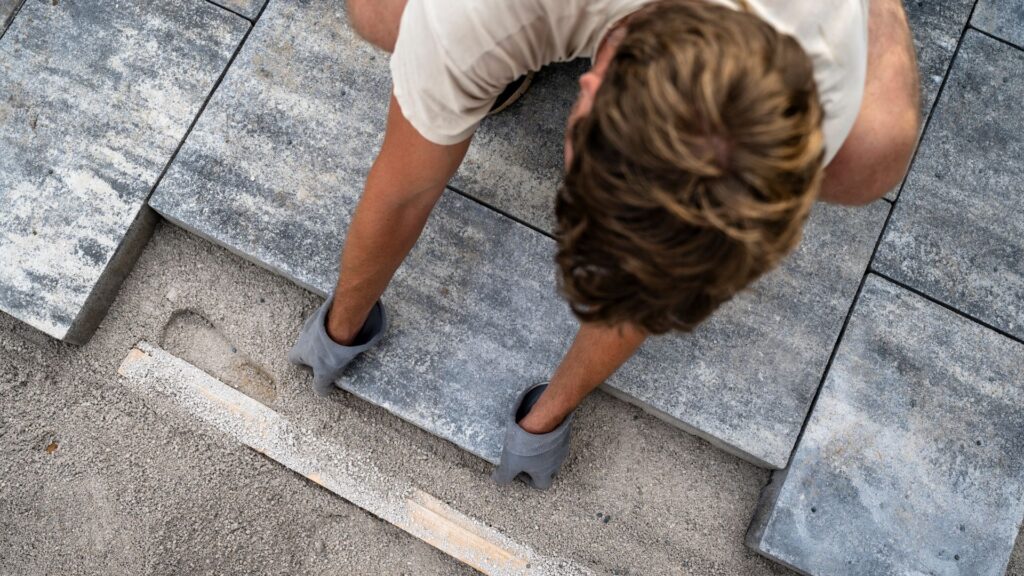
Installation Methods (DIY vs Professional)
When it comes to installing concrete pavers in New Zealand, homeowners often ask if they should take the DIY route or hire a professional. Both approaches can work, but each comes with its own set of responsibilities, costs, and outcomes. If you’re looking for a budget-friendly project and feel confident with hands-on work, DIY concrete paving can be rewarding. But if precision, durability, and long-term performance matter most, hiring experienced paving contractors in NZ may be the better option.
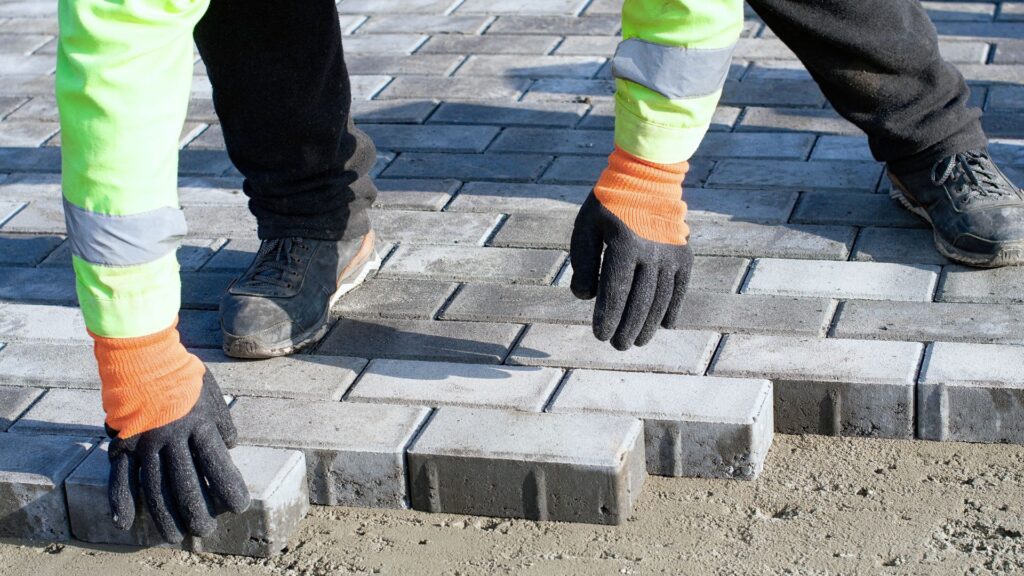
What A Homeowner Can Do vs What To Leave To A Contractor
If you’re tackling a small area like a garden path or patio, a DIY project may be manageable. Homeowners can handle planning, marking out the area, basic excavation, mixing concrete, and pouring. It’s essential to research best practices, especially when preparing the base and choosing the right concrete mix. For small-scale DIY concrete paving, ready-mix bags from your local hardware store are a convenient option.
On the other hand, larger projects such as driveways or sloped surfaces are best left to professional paving contractors in NZ. Contractors bring expertise in handling larger volumes of concrete, reinforcing the slab, ensuring even grading, and managing proper drainage. They also know how to avoid costly mistakes like incorrect curing or poor compaction, which can lead to cracks or sinking over time.
Tools Needed
Whether you go DIY or hire a pro, several tools are essential for a successful concrete paving job. For DIY projects, these are the most commonly used tools:
- Measuring tape and stakes
- Shovel or mini-excavator
- Wheelbarrow
- Concrete mixer or mixing tub
- Screed board
- Trowel and float
- Rubber mallet (if using paver molds)
- Level and string line
- Protective gear (gloves, boots, safety glasses)
For professionals, more advanced equipment like plate compactors, laser levels, and power screeds are used to speed up the process and ensure accuracy.
Time Estimates
Time varies depending on project size and experience level. A small patio (around 10 square metres) can take a DIYer 2 to 3 days, including site preparation, concrete pouring, and initial curing. Professionals can often complete the same job in one day.
Larger areas, such as a 50-square-metre driveway, might take a DIYer over a week when factoring in weather delays, labor limitations, and curing time. A professional team could complete this type of job in 2 to 3 days.
Mini Checklist
To keep things organized, here’s a simple checklist every homeowner or contractor should follow for successful installation:
- Planning And Permits: Always check local council regulations. Some areas require permits for driveways or structural concrete work.
- Site Clearing: Remove vegetation, debris, and soft soil. Level the area and compact the ground properly.
- Pouring And Smoothing: Mix concrete with the correct ratio, pour it evenly, then smooth and level it using a screed and trowel.
- Curing: Allow the concrete to cure properly, at least 24 to 48 hours before light use, and up to 28 days for full strength. Avoid walking or placing heavy objects during this period.
Choosing between DIY concrete paving and hiring a contractor in NZ depends on your skill level, project size, and how much time you can commit. If you want long-lasting results with less stress, working with a trusted professional may be the best investment. For confident DIYers, small concrete paving projects can be both achievable and cost-effective when done right.

Cost Of Concrete Pavers In NZ
When planning a paving project, one of the first questions most homeowners ask is, “How much will it cost?” In New Zealand, the cost of concrete pavers can vary depending on whether you go the DIY route or hire a professional. Understanding the price breakdown helps you plan better and avoid unexpected expenses.
Average Cost Per Square Metre
The average cost of concrete pavers in NZ ranges between $60 to $100+ per square metre. This price can fluctuate depending on your location, the type of concrete finish, and whether you’re doing the work yourself or paying for professional installation.
- DIY installation: Around $60–$80 per sqm, including materials and basic tools.
- Professional installation: Around $90–$130 per sqm, which includes labour, materials, and site preparation.
Hiring a contractor increases the cost, but it also means expert finishing, correct base work, and faster completion.
Cost Breakdown: Materials, Labour, And Maintenance
Here’s what contributes to the final cost:
- Concrete mix: $20–$30 per bag (varies by type and MPa rating)
- Base materials (gravel, sand, geotextile): $15–$25 per sqm
- Labour: $35–$60 per sqm for standard installs; more for exposed or coloured concrete
- Sealing (optional): $5–$10 per sqm for added protection
- Maintenance (long-term): Resealing every 2–3 years and basic cleaning
Concrete vs Other Paving Materials
Concrete pavers are often more cost-effective than other options like brick or tile. Here’s a comparison:
| Material | DIY Cost (per sqm) | Pro Installed (per sqm) | Durability | Maintenance |
| Concrete Pavers | $60–$80 | $90–$130 | High | Low |
| Brick Pavers | $80–$100 | $110–$150 | High | Medium |
| Tile Pavers | $90–$120 | $130–$170 | Medium | High |
| Gravel (loose) | $40–$60 | $70–$90 | Low | High |
Concrete strikes a balance between affordability, durability, and appearance, which is why it’s a top choice for many New Zealand properties.
Choosing concrete for your pavers gives you long-term value. While initial costs may vary, proper installation and low maintenance mean you’ll save more in the long run. If you’re on a budget and want durability with design flexibility, concrete paving is a solid option for New Zealand homes.

Maintenance Tips For Long-Lasting Concrete Pavers
Concrete pavers are a smart investment for outdoor spaces, but like any surface exposed to the elements, they need regular care to stay in top shape. Whether you’ve installed a patio, driveway, or pathway, proper maintenance can extend the life of your pavers and keep them looking fresh year-round. Here’s how to care for concrete pavers in New Zealand’s unique climate.
How Often To Clean
Concrete pavers should be cleaned every few months or whenever you notice a build-up of dirt, stains, or organic matter. A general rule is to wash them at the start and end of each season. For most homes, a basic sweep with a stiff broom followed by a light water rinse is enough. If grime is heavier, use a mild detergent and a soft-bristle brush. Avoid using harsh chemicals, as they can erode the surface or damage sealants.
When To Reseal
Sealing concrete pavers helps protect against moisture, stains, and UV exposure. In New Zealand, where weather conditions vary greatly between regions, resealing every two to three years is recommended. For coastal or high-rainfall areas, consider resealing more frequently. You’ll know it’s time to reseal when water no longer beads on the surface or if the pavers start to look dull or patchy.
Dealing With Moss Or Mould (Especially In Damp NZ Regions)
Moss and mould are common problems in shaded or damp areas, especially in parts of the South Island or rainy Northland. These can make surfaces slippery and unattractive. To treat them, scrub the pavers with a mix of water and white vinegar or a commercial moss remover made for concrete. Make sure to rinse thoroughly. Keeping the area dry and allowing for good airflow can help prevent regrowth. Trim nearby shrubs or trees to reduce shade and improve drainage where needed.
Preventing Cracks And Weed Growth
Cracks in concrete pavers usually appear due to ground movement, poor installation, or water damage. To prevent this, make sure the base beneath the pavers is well-compacted and properly drained. Resealing also helps by reducing water infiltration. Weeds can grow in the joints between pavers if left unchecked. Use polymeric sand in the joints to discourage growth, and pull any weeds as soon as they appear. Applying a natural weed barrier or light herbicide around the edges can also help.
Taking care of your concrete pavers doesn’t require much time, but staying consistent makes a big difference. Clean regularly, seal when needed, and keep an eye out for small issues before they become big problems. With a little effort, your concrete pavers will stay solid and attractive for many years.
Common Mistakes To Avoid When Using Concrete For Pavers In NZ
Choosing concrete for your pavers is a smart investment, but small mistakes during the process can lead to costly repairs or poor results. Below are the most common errors homeowners and DIYers make when working with concrete for pavers in New Zealand, and how you can avoid them.
Using The Wrong Mix
Not all concrete mixes are suitable for paver installations. If the mix is too weak, it won’t withstand regular foot or vehicle traffic. In NZ, a 25–30 MPa strength concrete is generally recommended for residential paving. Using a low-grade mix may save a little upfront but often results in cracking and surface erosion over time. For example, if you use a 15 MPa mix on a driveway, it may start to break apart within a few years, especially in areas with high rainfall or frequent temperature changes.
Pouring In Wet Weather
Concrete needs dry conditions to set properly. Pouring during rain or in high humidity can weaken the structure and lead to surface imperfections like dusting or scaling. In New Zealand, weather can be unpredictable, especially in regions like Auckland or the West Coast. It’s best to check the forecast and delay pouring if rain is expected within 24 hours. A homeowner in Hamilton, for instance, reported needing to redo a patio slab because unexpected rain diluted the mix and created a chalky finish.
Not Allowing Proper Curing Time
Concrete may look dry after 24–48 hours, but it needs up to 28 days to fully cure and reach maximum strength. Using the surface too early, such as parking a car or placing heavy furniture, can cause permanent damage like cracking or sinking. Many DIY projects in NZ fail because this step is rushed. A better approach is to rope off the area and mark the calendar. This one move can extend the life of your pavers significantly.
Skipping Base Prep
One of the biggest mistakes is pouring concrete directly on unprepared soil. Without a stable, compacted base, the pavers are more likely to shift or crack due to ground movement or poor drainage. In New Zealand, where soils vary from sandy coastal areas to clay-heavy zones like Wellington, proper base prep is essential. This usually includes removing loose soil, adding a layer of crushed gravel or base course, and compacting it before pouring the concrete. Skipping this step can turn a smooth patio into an uneven eyesore in a matter of months.
Avoiding these common mistakes not only saves you money but also ensures your concrete pavers last for years with minimal upkeep. Always follow best practices, choose the right materials, and take your time with each step of the process. Your future self, and your paved area, will thank you.
Regional Considerations In NZ
When planning a concrete paving project in New Zealand, it’s important to factor in your region’s unique conditions. The weather, location, and environment can all impact the durability and performance of your pavers. What works in Northland may not be ideal in Christchurch. This section helps you understand how to choose and use concrete for pavers based on where you live in NZ.
Weather Differences: North Island Vs South Island
The North Island and South Island have noticeably different climates, which can affect how concrete behaves over time. The North Island, especially areas like Northland and Auckland, experiences warmer temperatures, higher humidity, and more rainfall. In contrast, the South Island, particularly cities like Christchurch and Dunedin, faces colder winters, occasional snow, and frequent frosts.
In warmer North Island regions, concrete may cure faster, which sounds helpful but can actually lead to surface cracking if not managed properly. You’ll want to use a mix with controlled curing additives or shade the area while it sets. In the South Island, the risk is slower curing and potential frost damage during winter. It’s critical to use concrete mixes designed for colder climates and follow best practices for curing in lower temperatures.
Coastal Vs Inland Durability Tips
Coastal areas in New Zealand, such as Tauranga, Napier, or parts of Wellington, expose concrete to salt air, humidity, and wind. Salt can break down the surface layer of concrete over time, especially if it’s not sealed. If you’re near the coast, always use a sealer after installation and consider reapplying it every couple of years to protect against moisture and corrosion.
Inland regions, like Hamilton or Rotorua, don’t face the same salt exposure but might experience heavier ground movement, especially in volcanic or geothermal zones. For these areas, ensure the base is properly compacted and reinforced if necessary. A reinforced concrete mix can add extra stability and reduce the risk of cracking caused by shifting ground or temperature fluctuations.
Where To Buy Concrete Or Hire Paving Pros In NZ
No matter where you live, sourcing quality concrete and experienced installers is essential for a lasting result. National retailers like Bunnings and Mitre10 offer ready-mix concrete options, tools, and paving materials suitable for small residential projects. For larger jobs or custom mixes, local concrete suppliers often provide better options tailored to your region’s needs.
If you’re in Northland or Auckland, check out local concrete companies that understand the warmer climate and higher rainfall. In the South Island, especially in Christchurch, look for paving specialists with experience in frost-prone areas. Many NZ paving suppliers offer on-site visits, quotes, and advice based on your specific location.
When choosing a contractor, ask about their experience with your local weather and soil conditions. A good paving professional won’t just install pavers, they’ll ensure the base, mix, and finish match your environment.
By taking these regional factors into account, you’ll get a concrete paving solution that looks good and performs well for years to come, no matter where you live in New Zealand.
Ready to start your paving project? Visit us to explore quality concrete solutions tailored for New Zealand homes.
FAQs: About Concrete For Pavers In NZ
A 25–30 MPa concrete mix is ideal for pavers in New Zealand. It provides the strength needed to withstand outdoor elements like rain, frost, and heavy use.
Concrete pavers should generally be 50–60mm thick for walkways and up to 100mm for driveways or heavy vehicle traffic.
Yes, many homeowners in NZ choose to DIY concrete paver installation. Just ensure proper base preparation, correct mix, and curing time for best results.
Most small residential projects don’t need a permit, but it’s best to check with your local council, especially for driveways or drainage modifications.
Concrete typically takes 24–48 hours to set, but full curing may take up to 28 days. Avoid heavy use during this curing period.
Plain concrete has a smooth, uniform finish, while exposed aggregate reveals decorative stones on the surface for added grip and texture.
Expect to pay $60–$100+ per square metre for concrete paving, depending on the finish, labour, and site conditions.
Sweep regularly, clean with mild detergent, remove moss or weeds, and reseal every 2–3 years to protect against stains and weathering.
Cracks can result from poor base preparation, inadequate curing, or ground movement. Using a proper mix and compacted base reduces this risk.
You can purchase concrete mix from local suppliers like Bunnings, Mitre10, or specialist concrete companies across New Zealand.
Conclusion
Choosing the right concrete for pavers in NZ can make a huge difference in the durability, look, and long-term performance of your outdoor spaces. Throughout this guide, we covered why concrete is a smart choice for New Zealand’s changing weather, the different types you can use, the ideal mix ratio, how to prepare the base, and what to expect in terms of cost and maintenance. Whether you’re building a patio, walkway, or driveway, understanding these basics will help you avoid costly mistakes and get the best results. If you want a strong, low-maintenance, and visually appealing finish, concrete remains one of the top choices for paving across the country. Thinking of paving your outdoor space? Start with the right concrete.
About the Author:
Mike Veail is a recognized digital marketing expert with over 6 years of experience in helping tradespeople and small businesses thrive online. A former quantity surveyor, Mike combines deep industry knowledge with hands-on expertise in SEO and Google Ads. His marketing strategies are tailored to the specific needs of the trades sector, helping businesses increase visibility and generate more leads through proven, ethical methods.
Mike has successfully partnered with numerous companies, establishing a track record of delivering measurable results. His work has been featured across various platforms that showcase his expertise in lead generation and online marketing for the trades sector.
Learn more about Mike's experience and services at https://theleadguy.online or follow him on social media: